Sunday, May 31, 2009

I Won Something! Yeah!

Wow! So excited, I have my name in lights. I won the copics, and the stamp set from Kitchen Sinks from Copic Challenge last month! I'm so excited. I got my sink stamps yesterday and am waiting on my new Copics!

I am itching to get some ink on those stamps. Thanks to Kitchen Sink stamps!

Today is the last day for the next Copic Challenge. If you have some time to color today, don't forget to go post, lots of great tutorials over there! This week's topic is "Coloring Blond" hair. Even if you don't have time for all the tuts, the design team examples are great to learn from! I'm thankful for the Copic Challenge blog...I've learned a lot there!


Friday, May 29, 2009

CPCM Online Forum

I've been busy creating this week! I'm on the challenge team at Christian Paper Crafting Magazine's Online Forum. It's free for several more days if you'd like to check out what's going on. Great to be creating in an environment with people focused on Christ.

There are so many beautiful faith-based layouts in the gallery already I can't even tell you. My jaw is dropping.

I'm excited to be there and hope you'll check it out!


Friday, May 22, 2009

Great Stuff to Check Out (Link Love)


Ali Edwards
posted a great article on 20 scrapbooking tips this week if you missed it. Great ways to overcome hurdles.

Also, a scrapbook your weekend challenge with a few free hand-written Ali downloads here.

Finally, some great giveaways going on here! (Post five comments a day on that blog post to increase your odds of winning...)

Projects underway still to come later today here...
Until later chicks,


Thursday, May 21, 2009

A Walk and A Rose


I've been enjoying some walks lately. I took my camera along last week and just soaked up some simply beauty along the trail. Really fills me up to really take time to capture simple pleasures to enjoy again later.


My Peony


We had so much rain this year we didn't think we'd ever get soccer games in...but it made for some beautiful flowers!

Wednesday, May 13, 2009

Irises with Limited Copics (Which Copics Do I Buy First?)


This is my card for the Copic Creation Challenge to use purples for irises, lilacs, or purple fliers. I only have four Copic markers, so I have to really make the colors stretch. I used a pale grey, peach, blender, and pale grey. My first four starter Copic colors, and a wise choice, I think, for those who don't know where to start. They've served me well for shadowing, whereas I can make BICS and PhotoTwins to fill (all alcohol based [I think the Twins are alcohol, they don't move with anything]).

The purple BIC reacted nicely with the Copic blender pen, it really created a nice shade where I wanted it. (I could obviously stand to win me a few Copics!)


I don't have a lot of stamps for the pretty verses for the front of the card yet...not the ones I wanted for this card, so I decided to try to freehand it. I initially wished "joyful" had been more level, but then, I decided that it made me feel joyful to leave it and finish! Better to bless someone than get so tied up in details that you never send the card, I say!

Thanks to KittieKraft for the bow tutorial video on her site. Very helpful! What a difference! I didn'tremember it the first time I watched it, but the second time, I realized I didn't have to have the exact size bottle to tie the bow around, I'd be cutting the "loop" around the back of the card anyway...saves ribbon and is much more neat!

Supplies:
Iris Frame Um Floral Flowers stamp--from "My Heart Stamps for You"
Zig double ended Calligraphic Pens
Copics (listed above)
BIC Mark*It Markers
Ribbon: Fabric Counter
Card & Stock: Stash
Glitter: Ice Stickles

Information on Phototwins:
Phototwins markers are made for aging photos to that antique effect, but there are a nice opaque (I think alcohol based) pen, and I use them all the time. They are pretty cost effective off of ebay (less then ten bucks is a good deal...I included shipping with that for the ones I got. There are about three different sets available now...maybe four). I have the first two and would love the third but haven't found it yet.

SCAL Punches Like Stampin Up


This is my entry for Wacky Wednesday #11 with www.Rubberneckerblog.typepad.com. The challenge was to use some sort of stitching or virtual stitching.

I like to use my sewing machine for these cards because I use watercolors a lot and they don't tend to want to stay flat enough for adhesives. It's a functional thing for me.

It takes a lot of work to get the machine ready for cardstock--once I have to use it for hemming, it is a real risk as to whether the stock will get hung in it or not. I usually have to adjust the tension to light, than really let up on the pressure that holds the cloth or paper in place as well.


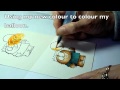
I used a light blue thread on top, and a tan thread underneath...just happened to be what was in the machine. It doesn't have to be a perfect match, just what I happen to have in the machine at the time.

I used an old card because I didn't have one big enough for my scene in my "cards" stock. I never liked the design on the front of this card, so I covered it with my own! (It was from a "card making" kit...blek...can't believe I bought it!)

SUPPLIES

Stamps:
Barn--SU "On the Farm"
Girl--SU "Friendships Grow"
Dog--"Loads of Love" accessories
Friend--foam stamp set from Big Lots
Trees: ebay seller (11 trees for $9, you can't beat that!)
Flower Grove: "Loads of Love"

Tools: Flower punches (MM), sticker jewels from Oriental Tradition Scrapbooking Mail-Order Magazine. Ribbon from fabric counter.

Techniques: Watercolor with Loew Watercolors, Stampin Up Marker Inks, Watercolor Pen, Cricut with SCAL for "friend" inked cutout.

Triumps: I was especially proud of the "Friend" cutout because I've admired the SU matching punches and stamps, but hated to invest more in punches when I have the Cricut. I recently found three sets of Cricut markers (yes, you can put markers in the Cricut instead of the blade), for $15...for all three sets on ebay. I've wanted to try them, but NOT for the $15 a package my Wal*Mart was charging. So, I jumped at this, and started racking my brain for how to use them.

I've just never understood why you'd want to use the markers that if you could print on your printer...now, I do!) You can cut out an image far too complex for cutting, then cut around it using the shadow feature with the SCAL computer software! I'm envisioning all sorts of bliss with this with all the "fonts" available with dingbats. I have an infinite number of ideas churning in my head.

If you have these things, let me just say that the KEY to this process is to hit "load paper" instead of "unload paper" EVERY TIME you switch between blade and marker--DON'T unload the paper!

I just took the marker out of the Cricut, inked my "friend" stamp with it, and it's all Matchy SU Matchy. So very cool.

SCAL (short for "Sure Cuts a Lot") is very much worth having using to use with your Cricut because you can use any font on your system without having to buy the Cricut cartridges (you DO have the one that comes with it because that installs your driver software to be able to hook your Cricut to your computer.) While you do have to use your computer with it, I don't plan to haul my Cricut around, so works great!

Monday, May 11, 2009

Friendship's Grow Card


This is my first challenge entry for WACKY WEDNESDAY #10. Ths week, you are supposed to do your favorite technique. I love the idea of scenes for stamps. So unique, and you get to color A LOT, and I like to color.

I have been reading Kittie Craft for about a year or so, and love her scenes. Her artistry, joy, and work inspired me in a tough emotional year (my mom and step-Dad went to serve in Iraq)...so a special thanks to her work.

Prior to that, let me just start by saying that I have said I'd NEVER be making my own cards.

Well.
I also said I'd NEVER scrapbook.
Now that we have pride out of the way and are having FUN and blessing people at the same time...hopefully....

I had the image of this card stuck in my head from one of Kittie's early cards. I loved the thought of coloring these children stamps. I hunted down the images on ebay, ordered some used $15.00 Prismas from a retired art teacher, bought some $8 watercolors from Michaels, found a few retired markers from SU, and away I went...

For the tree, I cut about an old sale flower bouquet I had that featured some leaf twigs coming out of the bouquet. It was from a stamp I hardly ever used (actually, it's still usable, even after the trimming!). I sketched the tree trunk and fence, also Kittie inspired notions.

Materials List--
Stamps: SU Set Friendships Grow
Other: Fiskars Border Scallop Punch, Sewing Machine for Zig Zag, card stock, chalk, SU Markers, Watercolor Pencils, Watercolors, PhotoTwin Markers (cheeks), White Signo Pen for highlights.

Here's a close-up of the central image:


This card was inspired by KittieCraft's card!

This is a new card-making blog for me, so be sure to say howdy!
And thanks for stopping by...


Friday, May 8, 2009

Stampin' Up Image Swap At SCS (Due June 2009)

You might want to check this out...I'm in!

http://www.splitcoaststampers.com/forums/showthread.php?p=14008176&posted=1#post14008176

I wanted to sign up quick so I could apply what few stamps I had in the right categories!


Thursday, May 7, 2009

The Three Ps: For Mother's Day

Okay, so you have to click the photo to read--that's as big as I can get it to post here!

This scripture is the theme for this blog and where I am right now in crafting...purposeful, people- focused, using the passions coming from me right now. Also, making money with it is not a bad idea!

All for Him! Sharing with you...what are you doing with the 3Ps right now? (People, passion, and purpose?) Tell me! Send me the link to your posts showing and I'll check them out.


Pieced Owls: Mother's Day Project

These are the cute pieced owls I've seen online the last few weeks. I've seen them done with all Stampin' Up punches, but I don't have all those, and was searching for a Mother's Day card idea when it struck me that I could probably still do it using what I had!

I got creative and thought they turned out super cute!

Materials:
  • Cardstock (colors can vary, but I like fall colors for this),
  • star flower punch (medium and small...you could use a different type flower than I did),
  • the smallest Creative Memories round punch,
  • an oval creative memories cutter (got it for Christmas, first time out of the package),
  • oval scalloped nestabilities for the wings (one cut makes two wings...after cutting a scalloped oval, I used the nesty edge as a guide for my cutting with a craft knife to cut the wings to have the smooth arch on the top of the wing--you could use anything you have for a guide).

Now...the head was tricky.

I tried a couple size labels (created in SCAL) on my Cricut because I don't have a label punch or nesty label. After cutting, I turned the large label sideways to cut half of it off. Yeah, you need to cut his head in half...sounds gross!

I then used a bracket punch to create the top of his head! Ingenius! I amazed myself, I know.

I also used another nestie as a guide to round the sides of his head using a craft knife.

Tip: Don't wait until midnight to start all your pieces, as I did. I was in bed by 1:30AM, but boy, did I feel it by 9PM Sunday night after playing keyboard, then and hosting a group of people here at the house for a leaderhip gathering...with a cold. Whew. Yes, it's Wednesday and I think I'm still recovering. Dedicated Sunday School teachers ROCK!

Here are the kid's interpretations--
MESSAGE:
They wrote: Guess WHooo Loves You? On the outside, and "I DO!!!!" on the inside.

They could have been more "finished" if I'd done letters for them, but Ivalue the Mother's Day cards best when my kids write on them in their own hand...so I let them do that part.


Some of the kids wanted to use the flowers for eyes, some didn't, and that was fine. Whatever they wanted.

I just let them adhere with glue sticks and stock cards.

The other teacher teaches every other week, she'll do the craft for Sunday and it will go with the craft.

Have a great day!


Beginnings

I wanted a blog for crafting. I like the element of surprise, so this blog is just for crafting so all my friends don't see their cards and things...well, before they get them in the mail! I'll need new friends and commentors those for the house to rock, so I look forward to meeting new crafters here to inspire me!